A parent arrives at the office with money; under a minute later they leave with a numbered receipt. This walks the collections desk step by step, then closes the day with a reconciled cash-up the school admin reviews.
finance.simusim.com~12 min
§ 01The collections desk
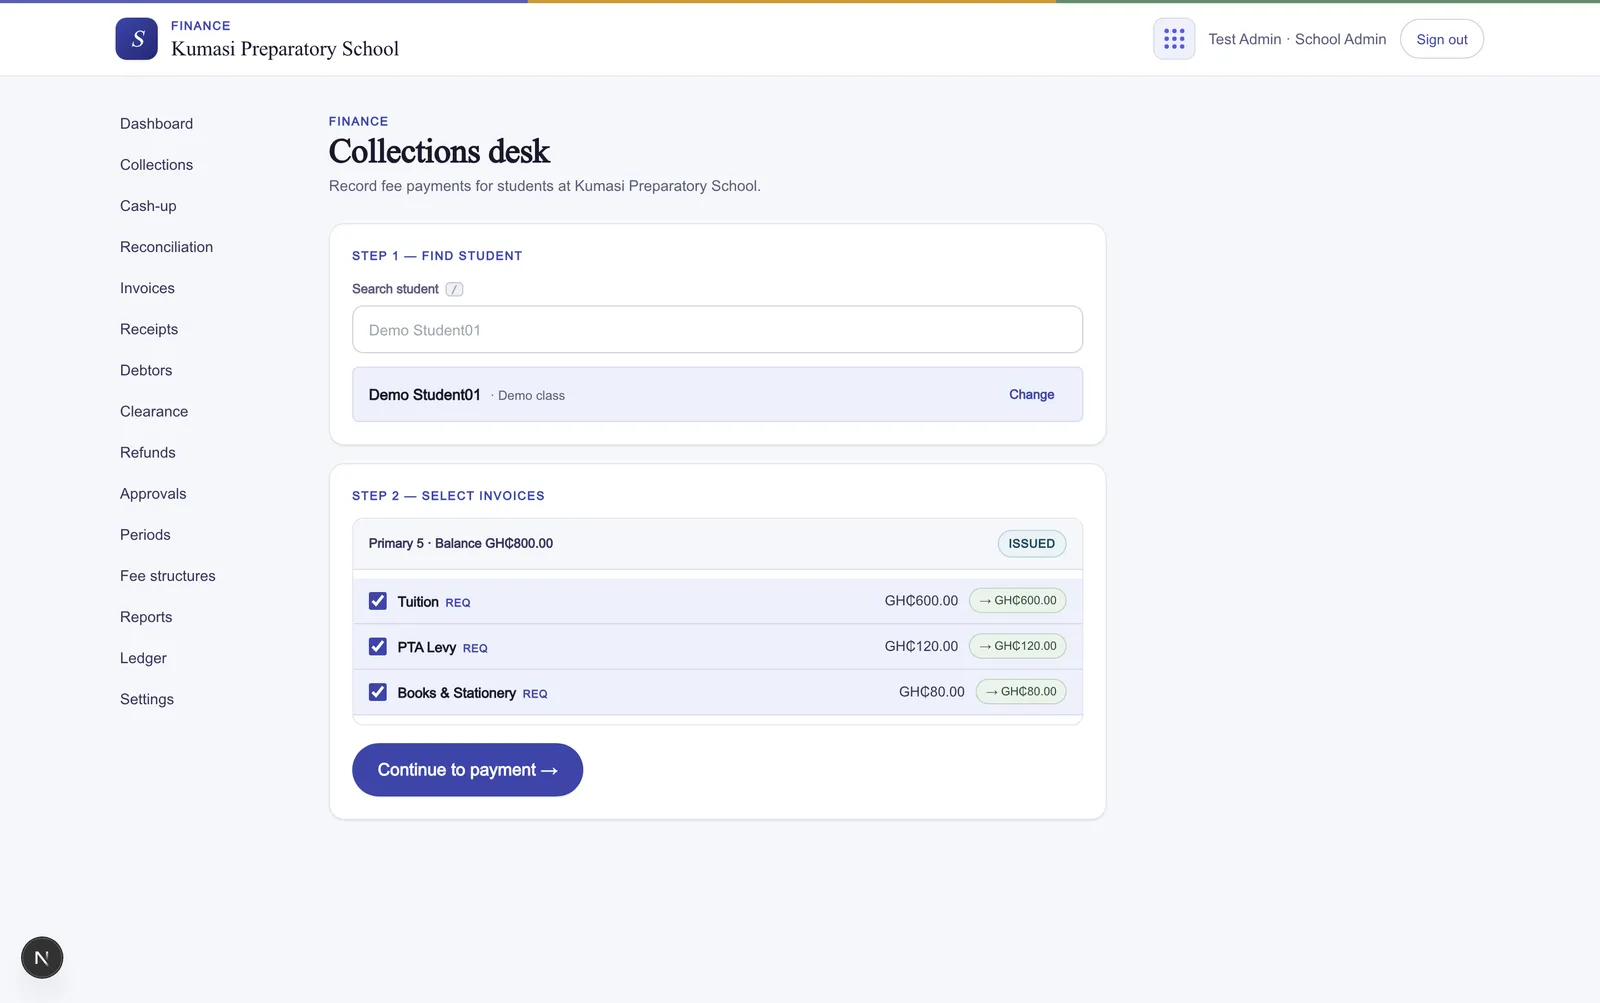
Open Collections. The desk is a three-step strip across the top — find the student, select what they're paying, then take the money. You stay on one screen for the whole transaction.
Fig.The desk keeps the whole transaction on one screen, so the next person in line is one keystroke away.
Step 1 — Find student. Start typing a name or student code in the search box; results are filtered as you type (debounced, so it waits a beat before searching). Each result shows the student's class and any balance. Keyboard shortcuts: press / anywhere to focus the search box, ↑/↓ to move through the results, and Enter to select the highlighted student.
Step 2 — Select invoices. The student's Issued and partially-paid invoices appear pre-selected, with an allocation preview showing how the money will spread across them. Untick anything the parent isn't paying today. If the student has no outstanding invoices, the button reads Record prepayment — the money posts to the student's credit balance to be applied later.
Step 3 — Record payment. Enter the amount and the payment details, then commit. (The next section covers the methods.)
The /-key
A bursar with a queue at the window rarely touches the mouse: / to search, arrows to pick, Enter to select — then straight to the amount.
§ 02Payment methods
In Step 3, choose how the money came in from the Payment method dropdown:
Cash — money handed over at the office.
Bank transfer — paid into the school's account.
Mobile money — a momo transfer.
Cheque — a written cheque.
Pick Mobile money and a Network field appears so you can record which wallet it came from:
MTN Mobile Money
Telecel Cash (formerly Vodafone)
AT Money (AirtelTigo)
A Reference / receipt no. field captures the teller, transfer or cheque number. It's required for bank transfer and cheque (so the payment can be traced back to the statement) and optional for cash and mobile money. With the amount, method and reference in place, press Record payment.
Note
The allocation preview updates with the amount you type, so you can see exactly which invoice lines the payment lands on before you commit.
§ 03The receipt
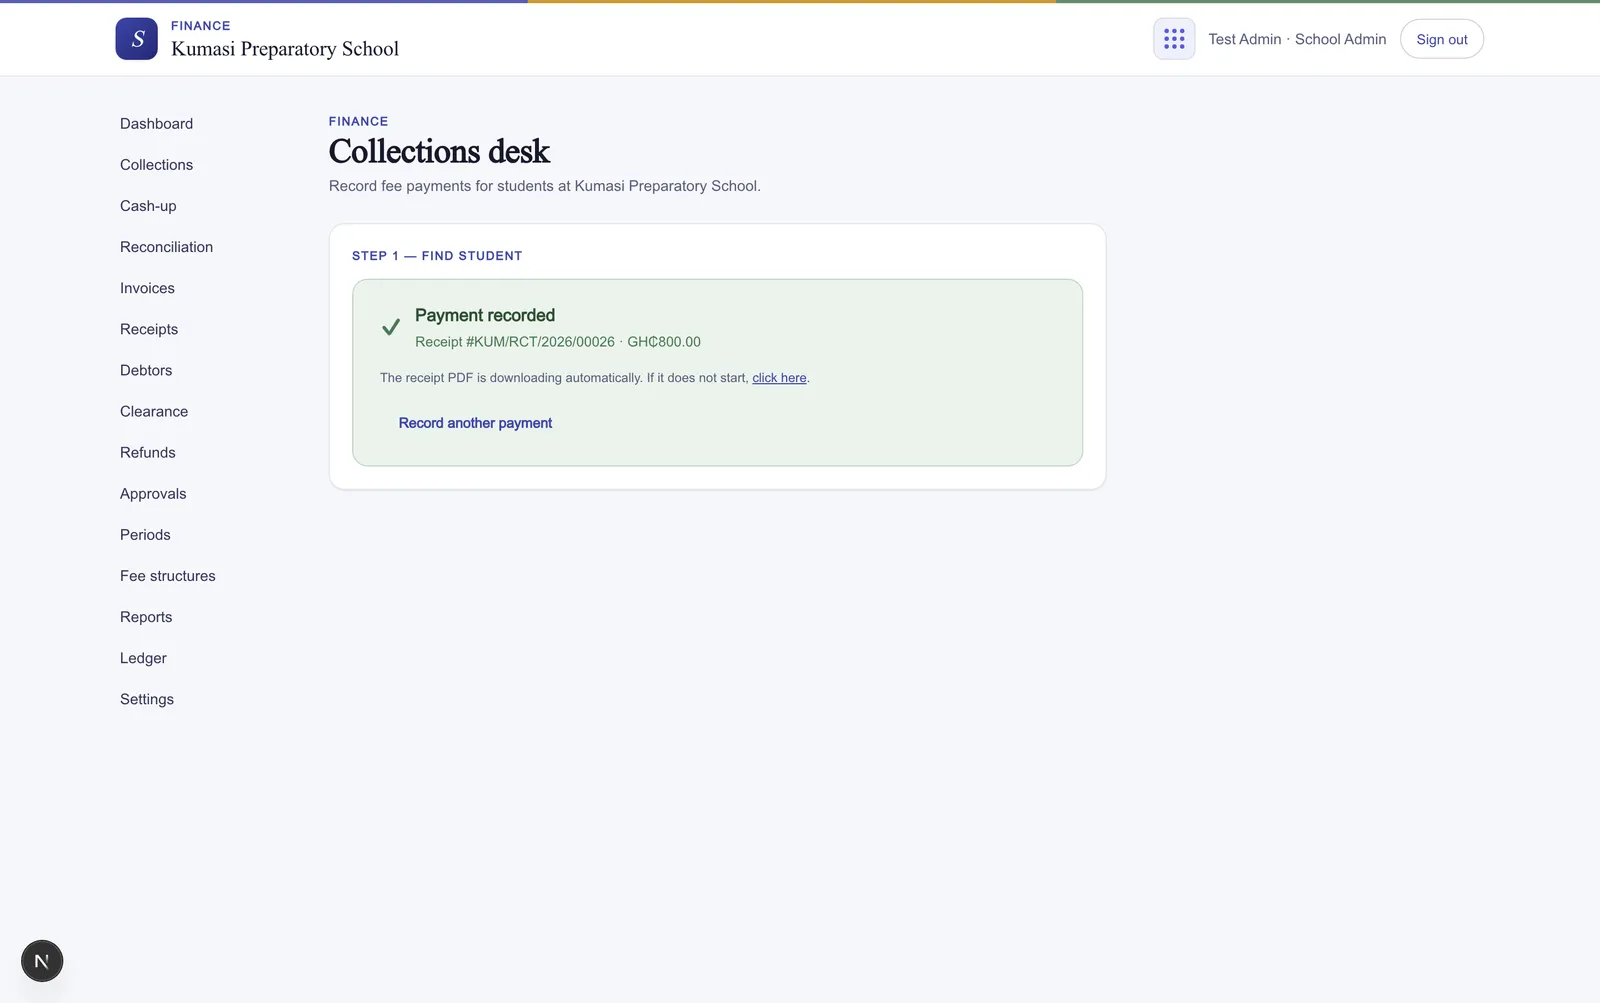
The moment you record the payment, the desk confirms Payment recorded and shows the receipt number — something like KUM/RCT/2026/00026 (your school's prefix, the year, and a running serial). The receipt PDF downloads automatically, ready to print or WhatsApp to the parent.
Fig.The serial is generated by Simusim — you never type a receipt number, so two payments can never share one.
Press Record another payment to clear the desk for the next person in line.
§ 04Finding & reprinting receipts
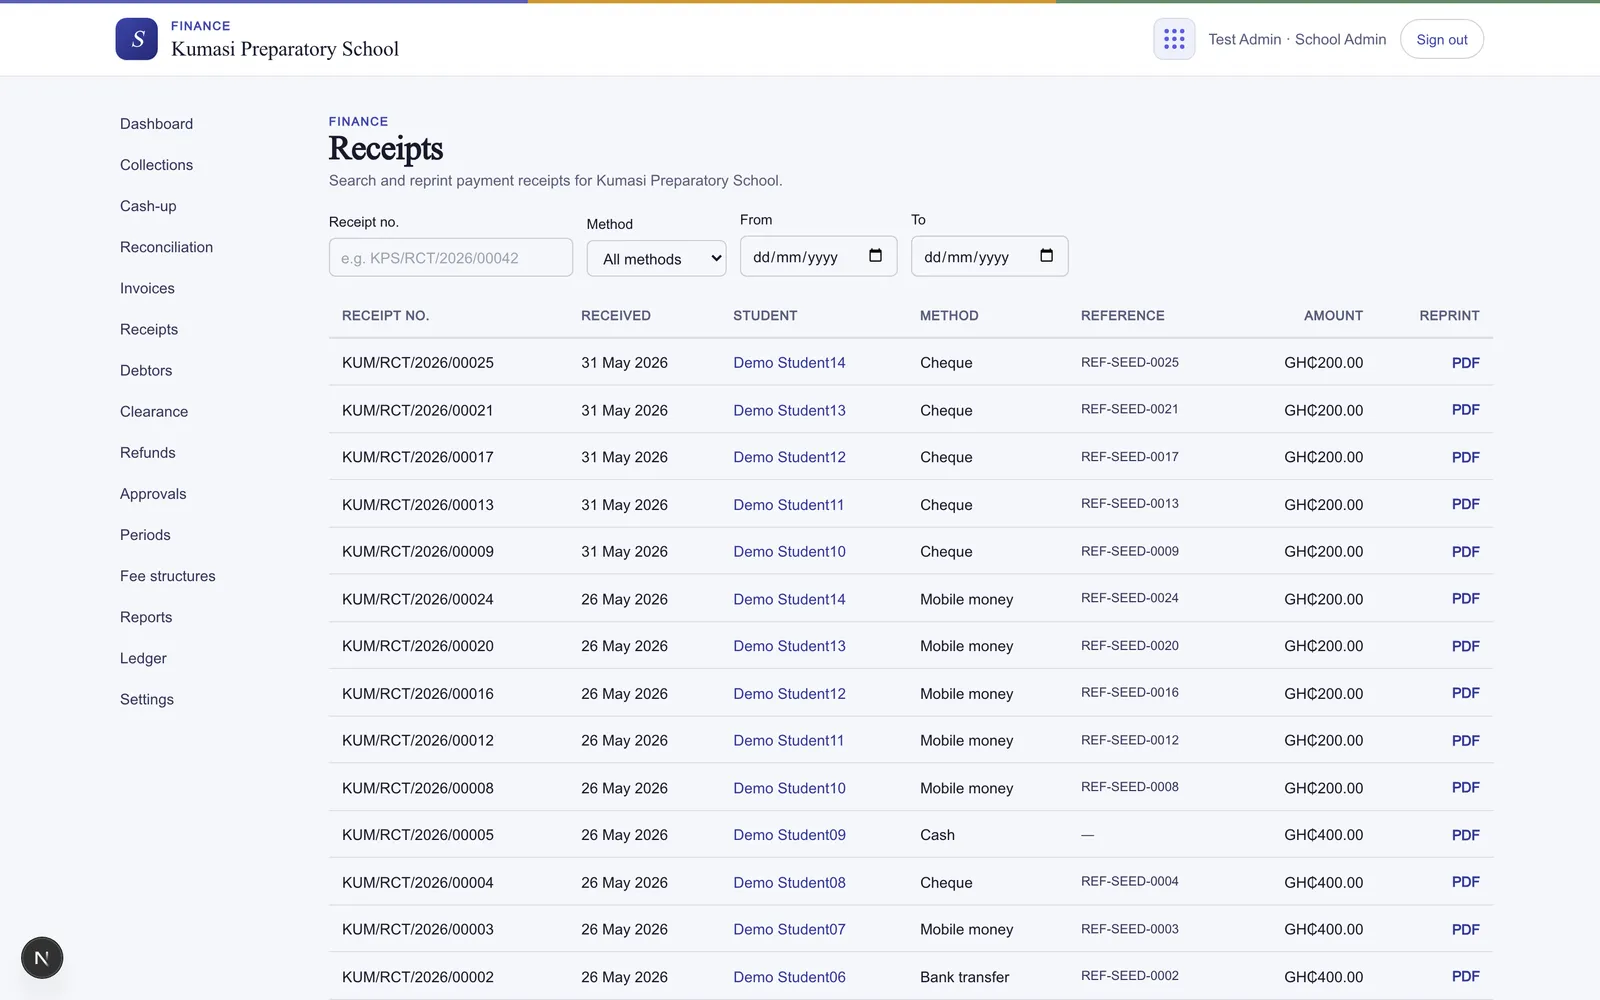
Lost the printout, or a parent wants a copy of an old payment? Open Receipts for the full list of every payment taken.
Fig.Voided receipts stay on the list with a badge — they're never deleted, so the trail is complete.
Filter by Receipt no., Method, and a From/To date range to narrow the list.
Each row carries a Reprint link that regenerates the receipt PDF.
A receipt that was reversed shows a VOIDED badge so it can't be mistaken for a live payment.
§ 05The daily cash-up
At the close of the day the bursar reconciles the cash drawer against what Simusim recorded. Open Cash-up.
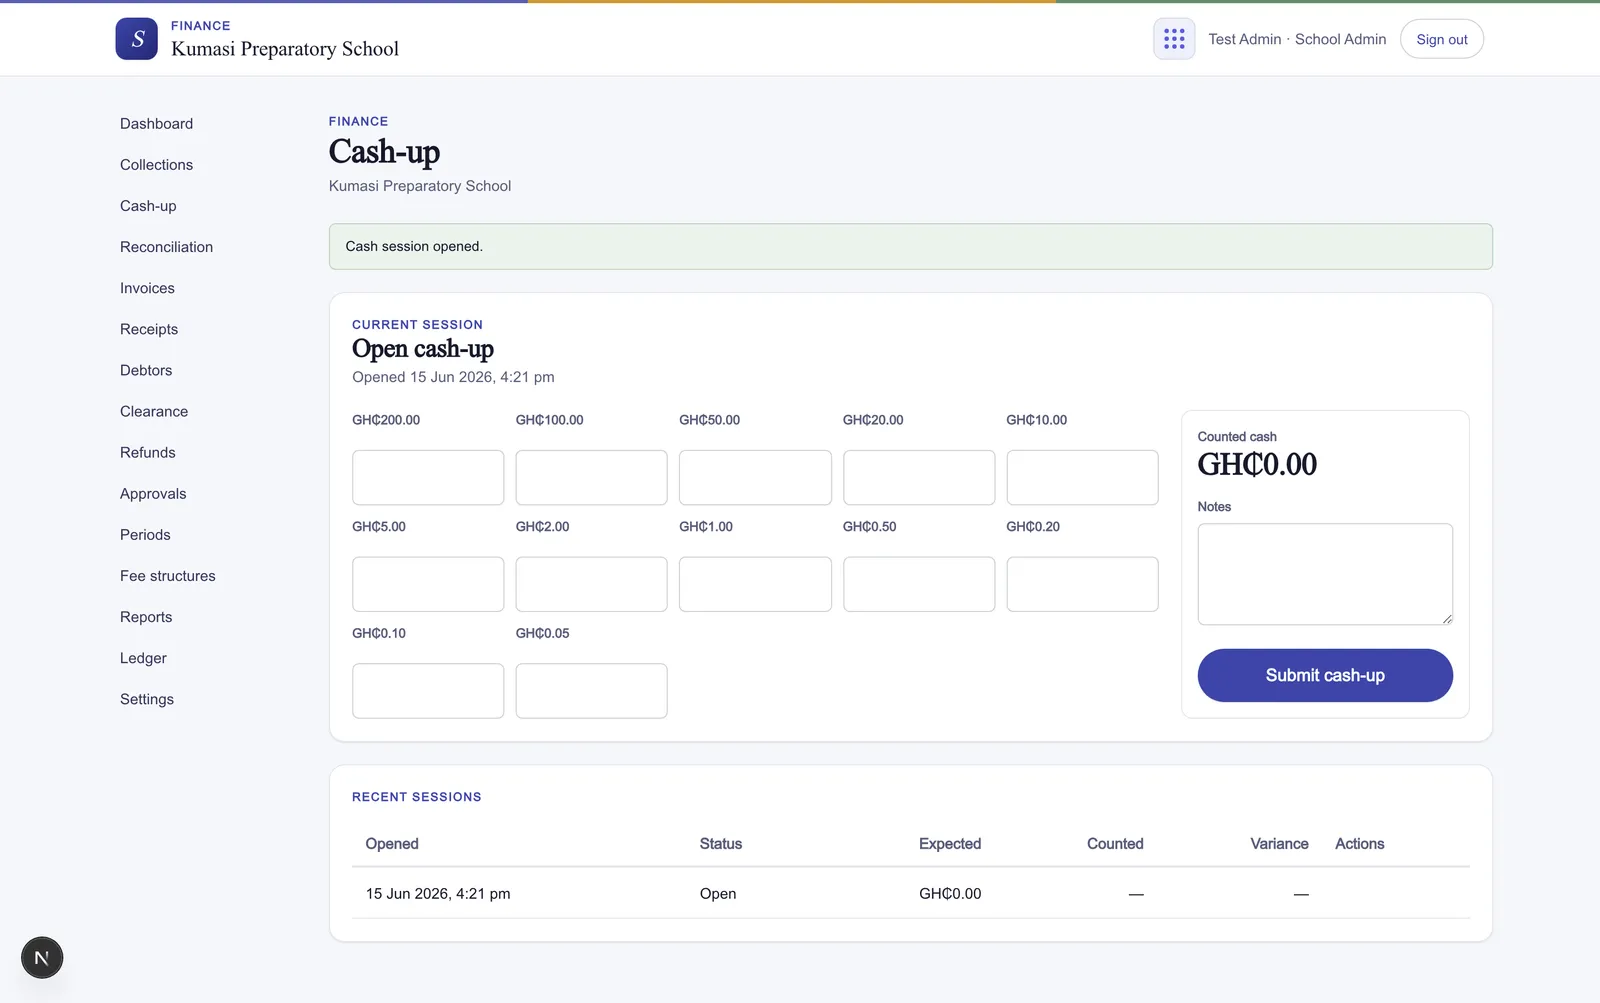
Fig.Count the drawer once into the grid; Simusim totals it and compares against the cash it expected.
Press Open session, then Open cash-up to start a count.
Work down the denomination grid — from GHS 200 notes all the way down to the 0.05 pesewa coin — entering how many of each you counted. The Counted cash total adds up as you go.
Add any Notes (a shortfall you can explain, a float carried over), then press Submit cash-up.
An admin reviews it. The Recent sessions table lists each session's Opened time, Status, Expected, Counted and Variance; the admin can Approve, Reject or Reopen a session.
Variance
A non-zero variance isn't blocked — it's recorded. Note the reason before you submit so the admin reviewing the session sees your explanation alongside the figure.