Your morning briefing in the Teacher Portal, then the four working tools in the Staff Console: Attendance, Gradebook, CBT (computer-based testing), and Lesson Plans — through to wrapping up a term so report cards can go out.
teacher.simusim.com · staff.simusim.comSign in: phone + PIN~20 min read
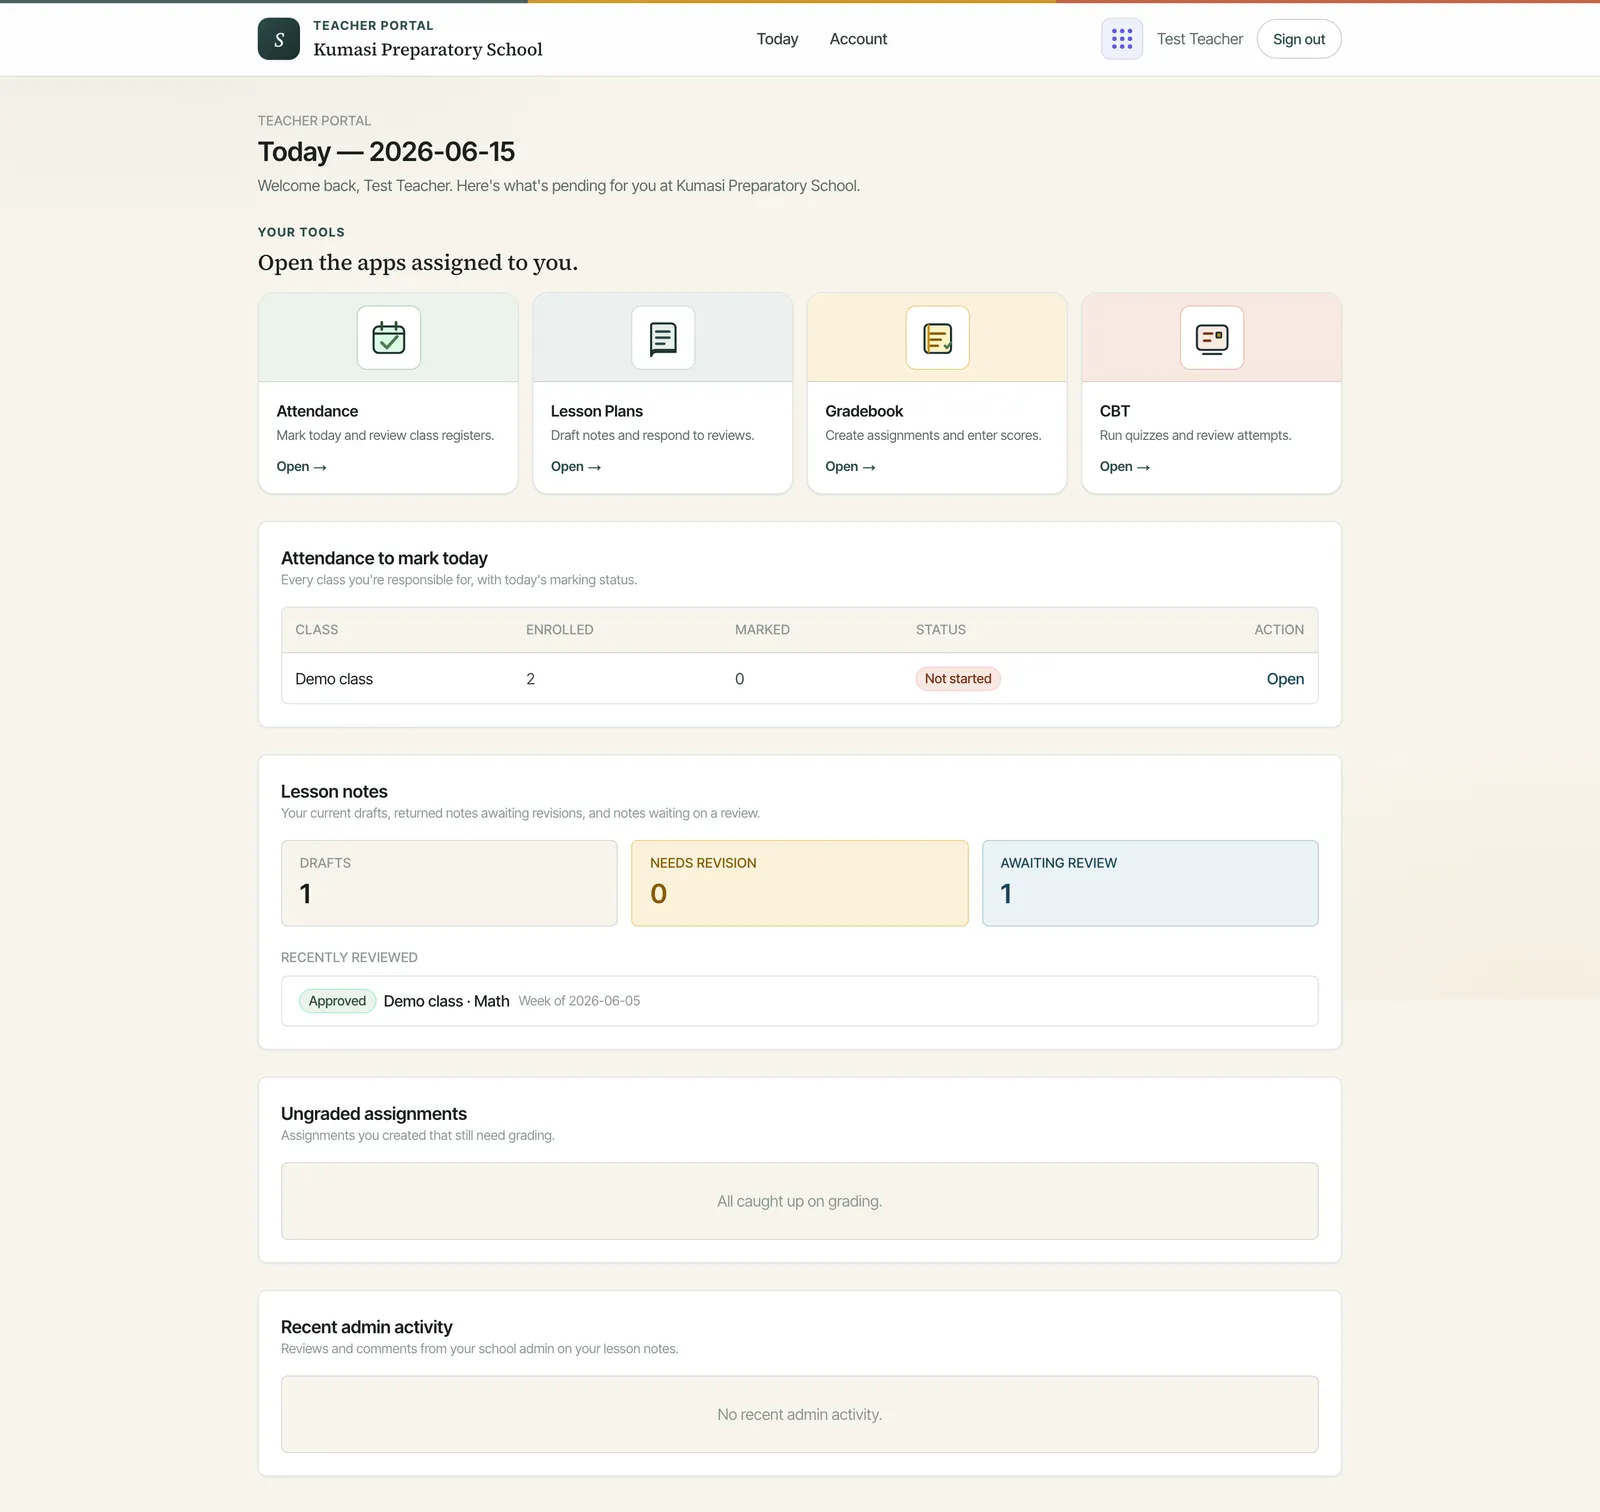
Sign in through your school's page with your phone number and PIN (see Getting started). You land on Today — one screen that answers “what's waiting for me this morning?”:
Attendance to mark today — every class you're responsible for, with its status: Not started, Partial, or Done, and an Open link straight into marking.
Lesson notes — three tiles: Drafts, Needs revision, and Awaiting review, plus your recently reviewed notes with the admin's feedback.
Ungraded assignments — anything you created that still needs scores, with a Grade now link. Overdue items are highlighted.
Recent admin activity — messages and updates from your school admin.
Every link drops you into the right page of the Staff Console.
Fig.The Teacher Portal — your daily briefing. Every link opens the matching Staff Console module.
§ 02Staff Console basics
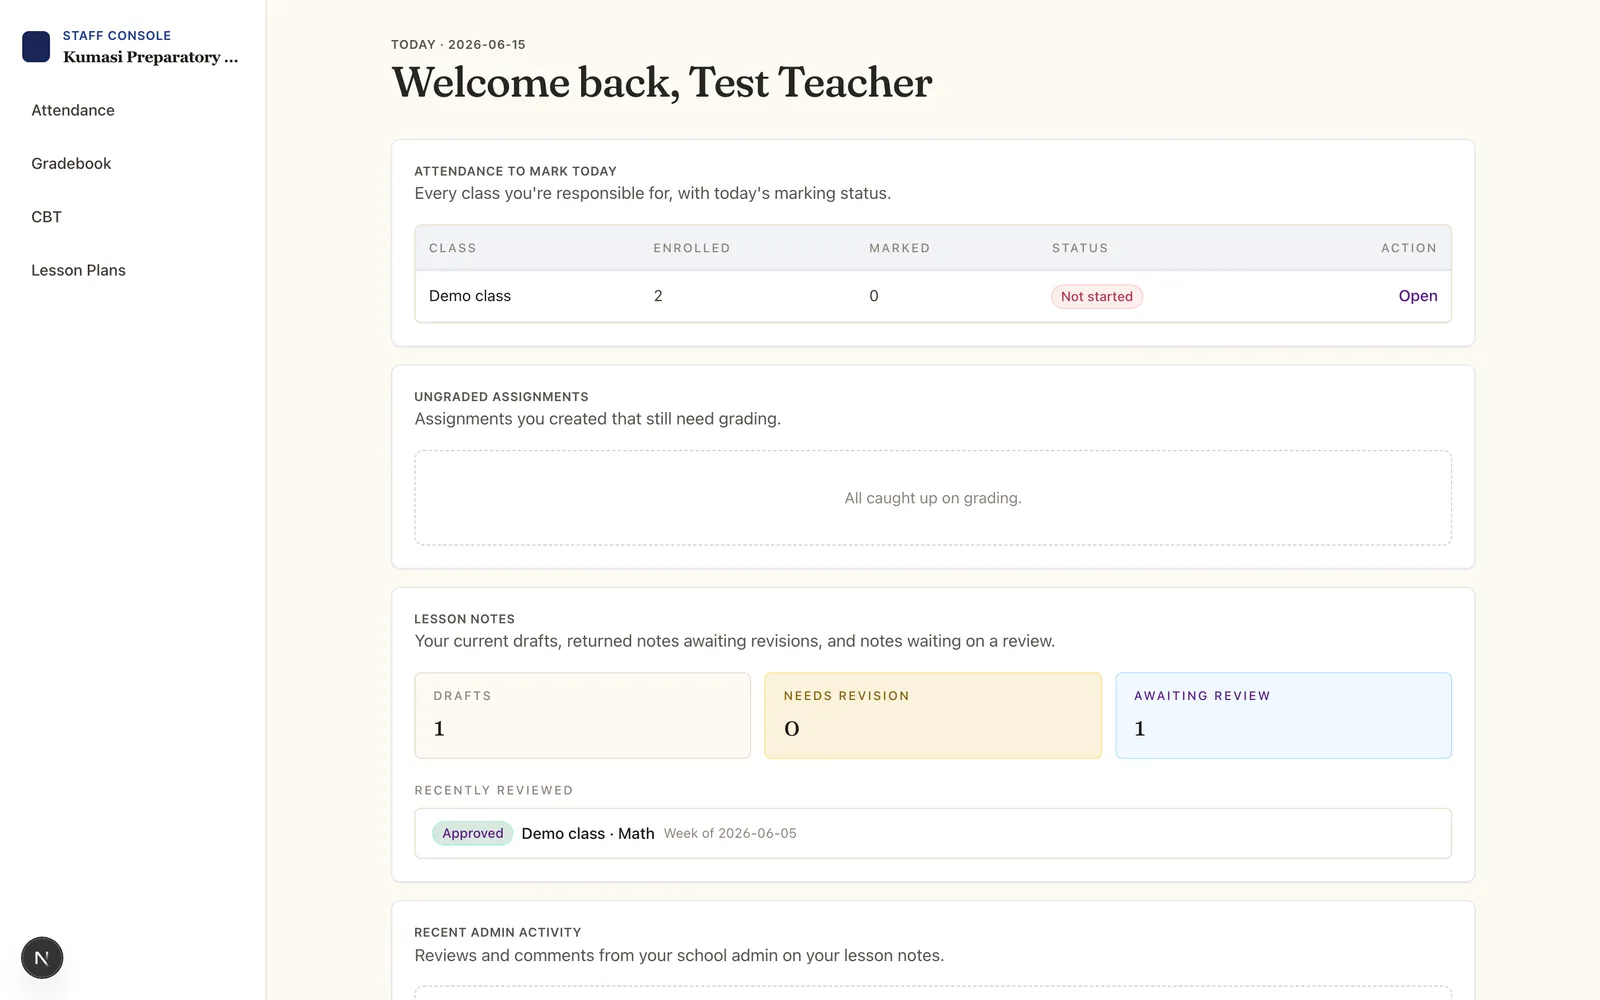
The Staff Console (staff.simusim.com) brings your tools behind one sidebar. The core working tools — Attendance, Gradebook, CBT and Lesson Plans — sit alongside My Schedule, Announcements, Messages, Behaviour and Resources:
My Schedule — your weekly timetable and per-period attendance (see Timetable).
Announcements and Messages — class announcements and your parent-message inbox (see Communication).
Behaviour — log discipline or merit incidents for your students (see Behaviour).
Resources — upload and share documents with staff, parents and students (see Resources), and collect student work (see Homework).
Two things shape what you see:
Teachers see their own classes. Attendance shows classes where you're the homeroom teacher; Gradebook and Lesson Plans show the subjects you're assigned in each class. School admins see everything.
Modules are switched on per school and per teacher. If a module is missing from your sidebar, your admin hasn't enabled it for you (see App access).
Fig.The Staff Console gathers your modules behind one sidebar.
§ 03Attendance — marking a class
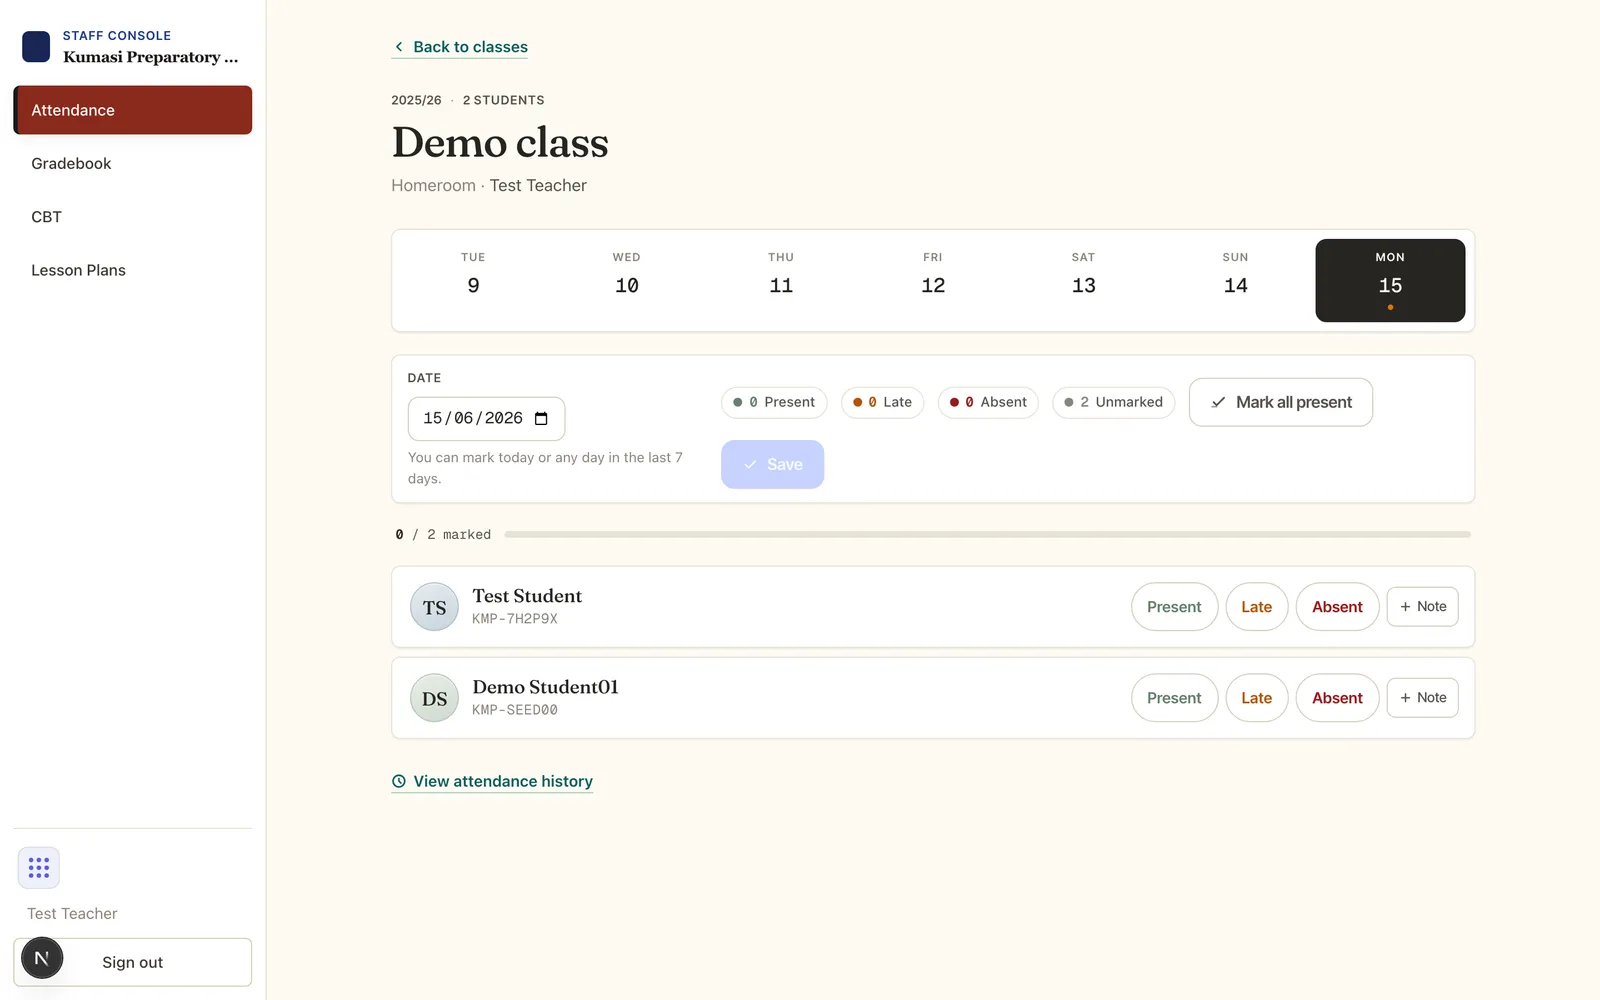
Open Attendance. Under “My classes — pick a class to mark today”, tap your class card.
The roster appears with today selected on the week strip. For each student, tap one pill: Present, Late, or Absent. In a hurry? Mark all present fills everyone unmarked, then change the exceptions.
For a Late or Absent student you can tick Excused and pick a reason — Sick, Medical appointment, Bereavement, Travel, Religious observance, School activity, Suspension, or Other. Picking reasons like Sick auto-ticks Excused. Add a Note (up to 500 characters) if useful.
Watch the progress meter (“14 / 28 marked”) and press Save. You'll see a confirmation like “Saved 28 marks (25 Present, 2 Absent, 1 Late)”.
Good to know
Drafts save themselves. Unsaved marks are kept on your device (“Draft saved 09:14”) and restored if the page reloads — handy on patchy connections.
The 7-day window. Teachers can mark today or any of the last 7 days (a yellow banner reminds you a past date is a late entry). Older than that, ask a school admin to backfill.
Corrections. A saved row shows a small Correct button — change the status, excused flag, or note, then Save correction.
History.View attendance history shows a students × days grid for the last 14 days with an absences column — chronic absence jumps out.
If your school runs the face check-in kiosk, gate scans pre-mark students present; you review rather than start from zero.
Fig.Marking a register. Excused toggles, reasons and the Correct button appear on Late/Absent rows.
§ 04Gradebook — assignments & scores
Create an assignment
Open Gradebook. Under “My subjects — pick a subject to grade”, tap the class–subject card.
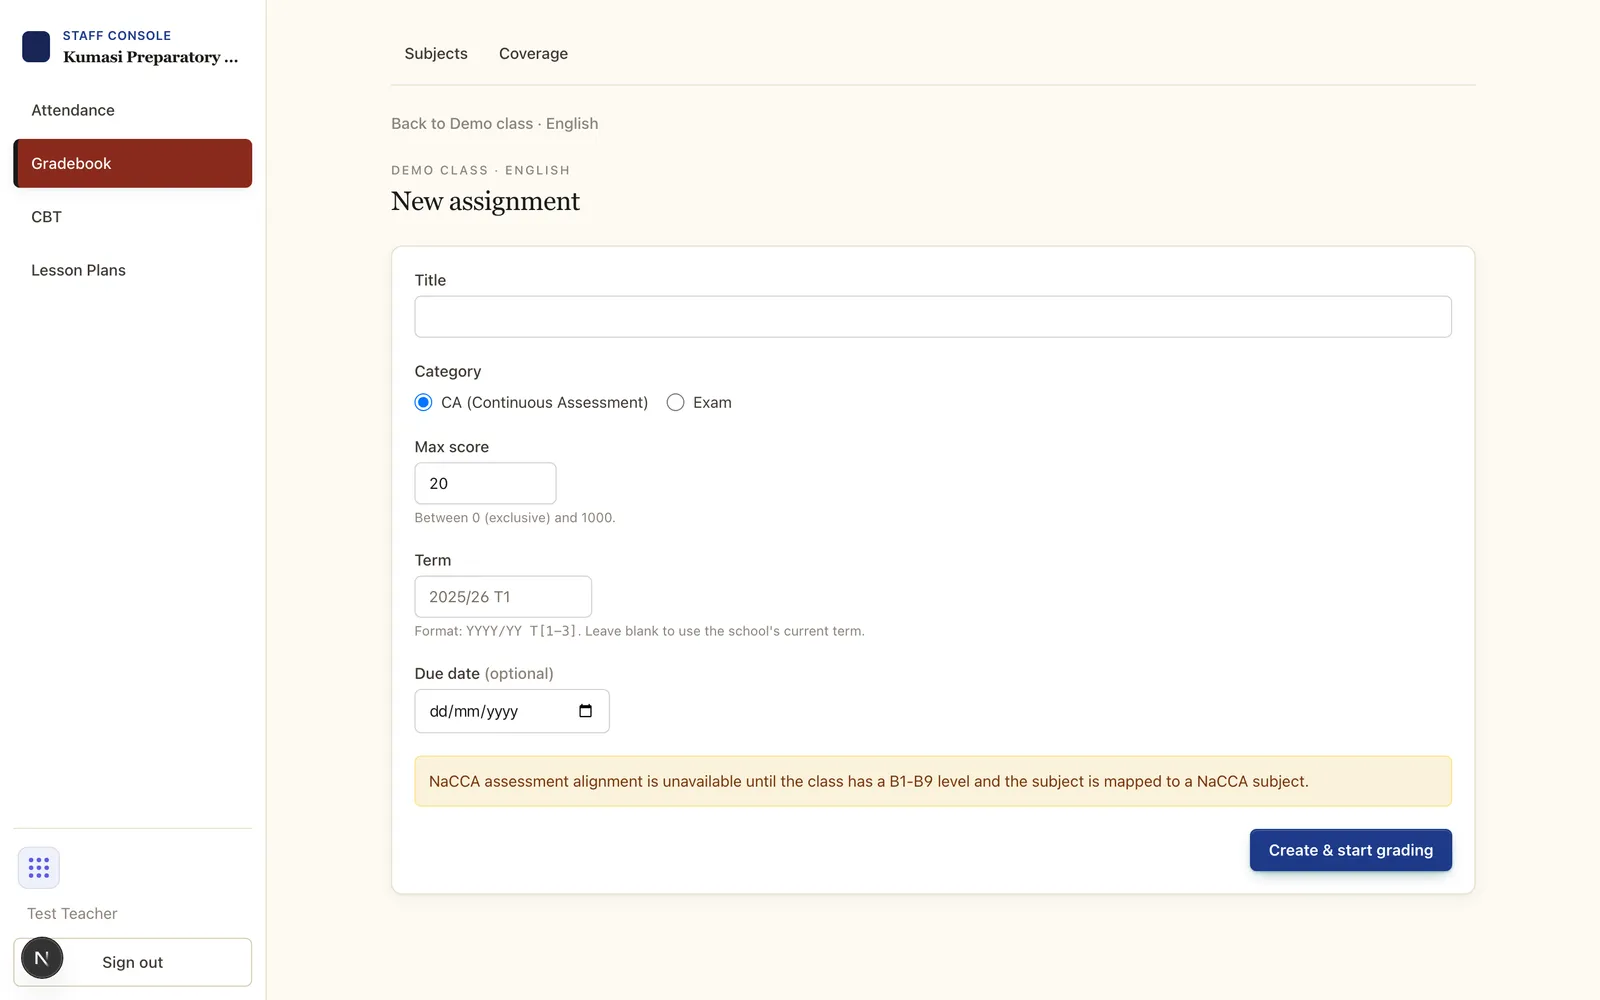
Press the new-assignment action and fill in:
Title — e.g. “Fractions quiz 2”.
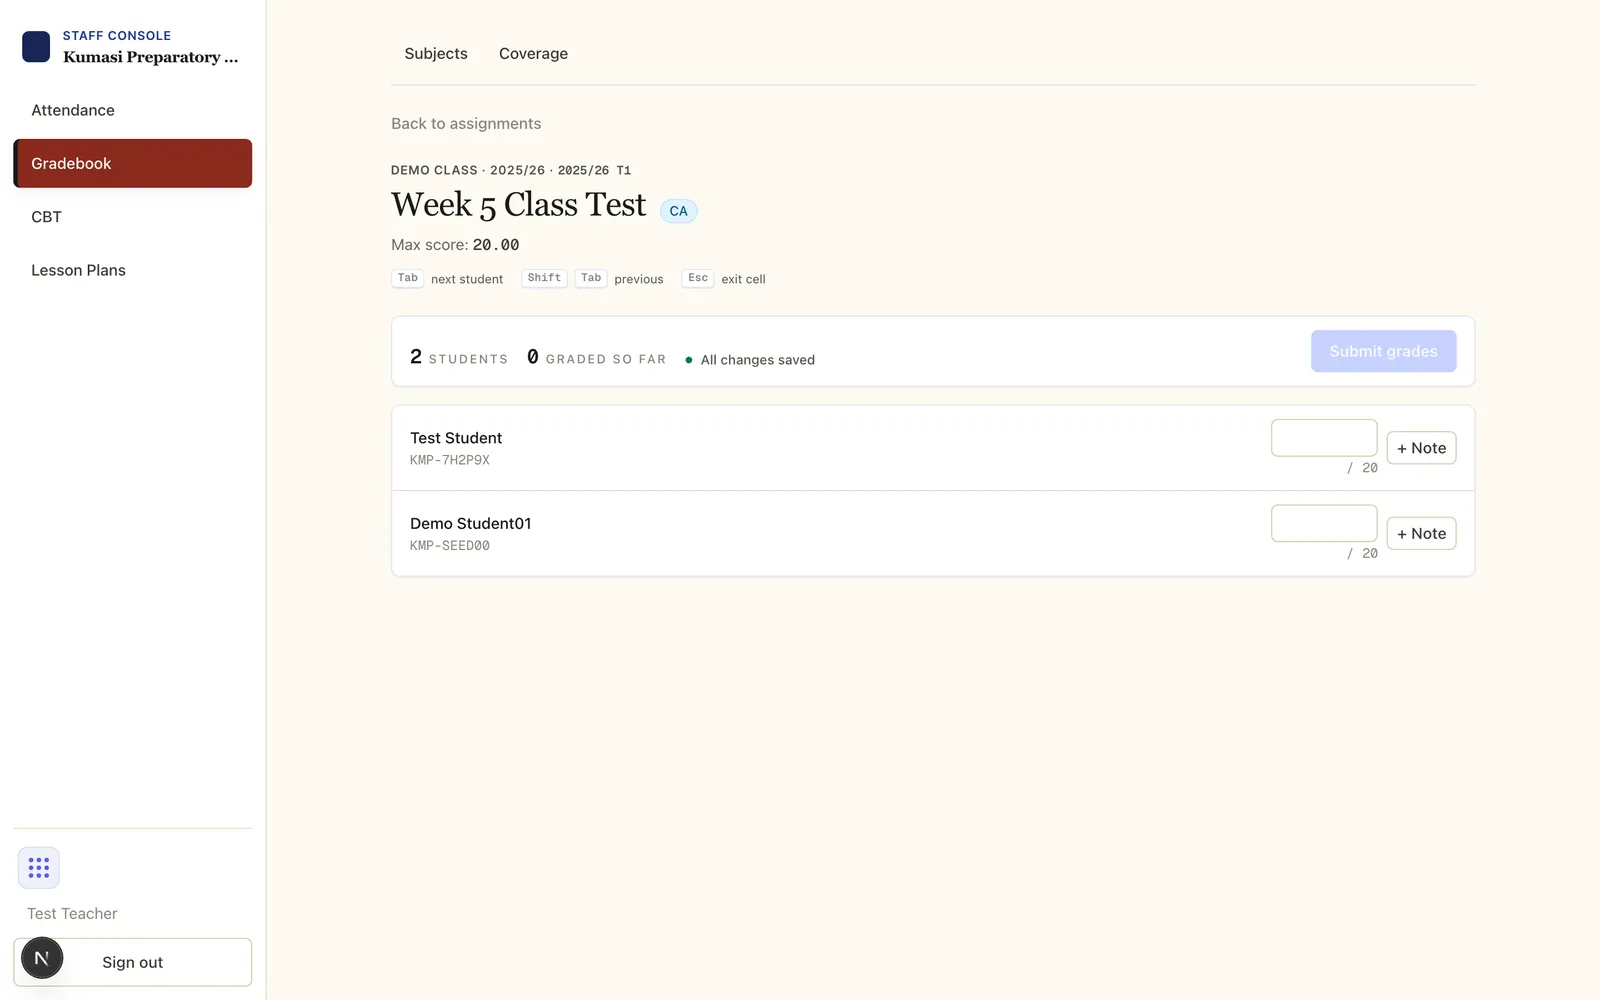
Category — CA (Continuous Assessment) or Exam. This decides which side of the term weighting the scores land on.
Max score — anything up to 1000 (e.g. 20).
Term — leave blank to use the school's current term, or type one in the form 2025/26 T1.
Due date — optional; drives the “overdue” flag on your briefing.
Curriculum alignment — optionally tag the NaCCA indicator the assessment covers (available once the class has a B1–B9 level and the subject is NaCCA-mapped).
Press Create & start grading — you go straight to the score sheet.
Enter scores
The grading page lists the roster with a score box (and optional feedback) per student. Enter scores, then Submit grades. You can return any time — your Teacher Portal briefing tracks what's still ungraded.
Term grades view
Term grades shows the computed picture per student per subject: the CA average, Exam average, and the weighted term grade. The weighting (shown top-right, e.g. “CA 30% · Exam 70%”) is set by your school.
Fig.Creating an assignment — title, category (CA or Exam), max score.Fig.Then enter scores out of the assignment's max; your briefing tracks what's still ungraded.
§ 05Term wrap-up & publishing report cards
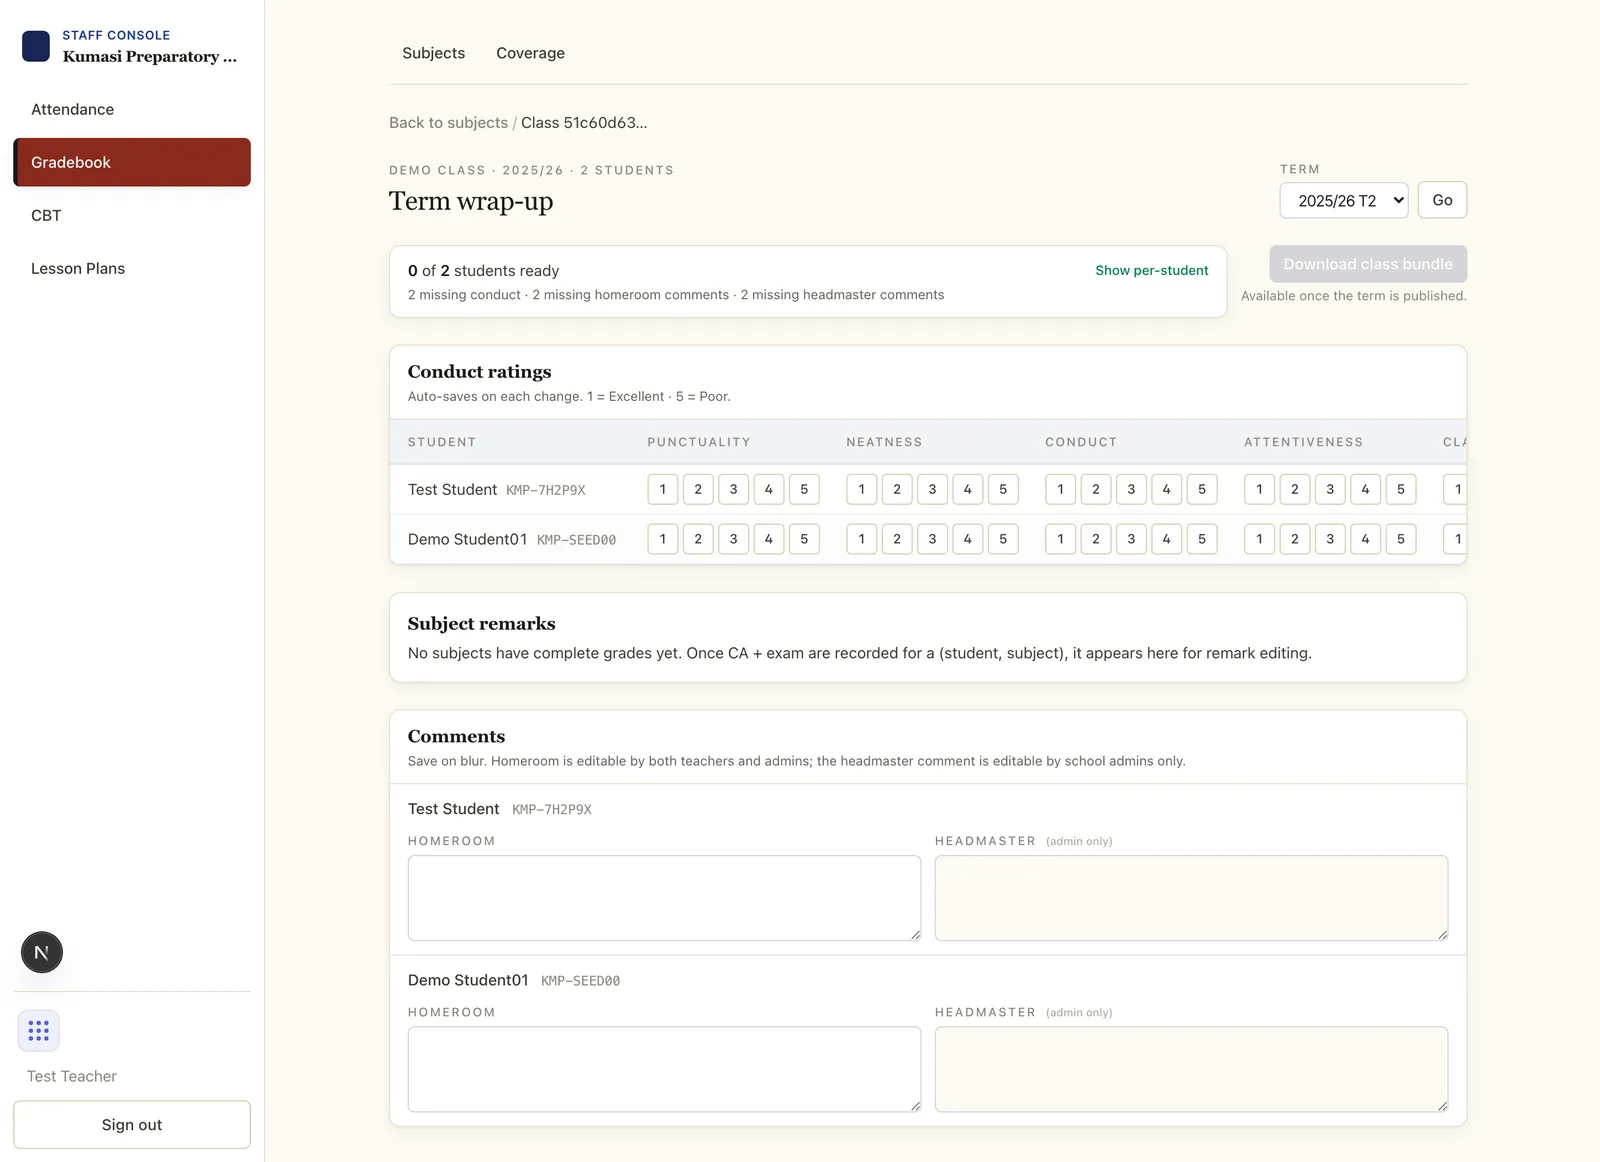
When a term's marks are in, open the class's Term wrap-up page and complete its three sections:
Conduct grid — rate each student on the school's conduct traits (Punctuality, Participation, …).
Subject remarks — a short remark per student per subject. Sensible defaults appear from the grade scale (e.g. a D pre-fills “Needs more effort”); edit freely.
Comments — one overall comment per student.
A readiness banner tracks what's missing (“Conduct grid: 3 students missing”). Publishing the term itself is a school admin action, done from School Admin → Settings → Term calendar once your wrap-up is complete — give your admin the nod when you're ready.
After publishing
The wrap-up becomes read-only: “This term is published. Conduct ratings, subject remarks and comments are read-only. Ask your admin to unpublish before making changes.” Parents can now download report cards from their portal, and the Download class bundle button on the wrap-up page unlocks so you can fetch the official PDFs for the whole class.
Fig.Term wrap-up — conduct, remarks and comments in one place before the admin publishes.
§ 06CBT — computer-based tests
Build and publish a quiz
Open CBT and pick the class.
Press New quiz: give it a title, choose the subject, set the points, optionally a term and instructions, then create it.
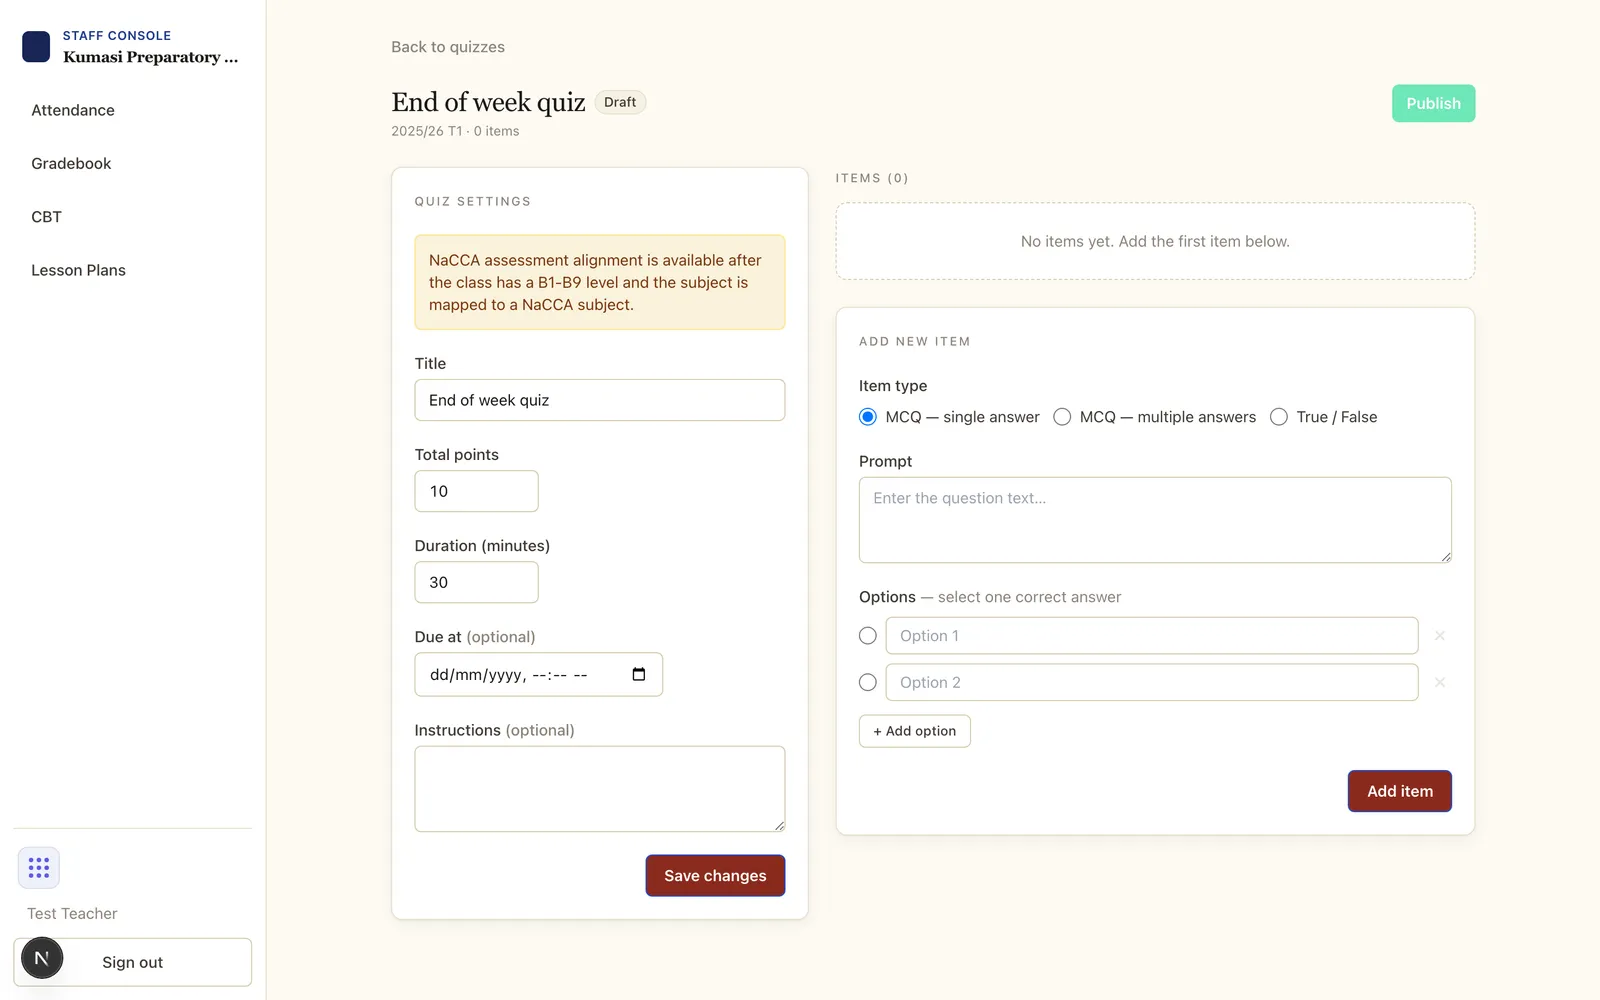
On the edit page, Add item for each question — MCQ — single answer, MCQ — multiple answers, or True / False — marking the correct answer(s) and points. Reorder with the up/down controls.
Keep it as a Draft while you work. When ready, press Publish — students in the class can now see it in their portal's Quizzes page. Published quizzes can't be edited.
While students take it — and after
The results page shows enrolled vs submitted counts and the average, with each student's status (Not started / In progress / Submitted) and score. Marking is automatic.
Open any attempt to review it question by question — the student's answer, the correct answer, and points awarded.
If the system noticed suspicious behaviour during an attempt (switching windows, multiple tabs, losing focus), the attempt's Cheat events column shows a flag count; open it for a timeline of the events for your judgement.
Reset attempt lets a student retake (e.g. after a power cut mid-quiz).
Quiz scores feed the Gradebook chain: CBT → Gradebook → term grades → parent portal.
Fig.Author questions while the quiz is a draft — single-choice, multiple-choice or true/false. They lock once published.
§ 07Lesson plans — weekly notes
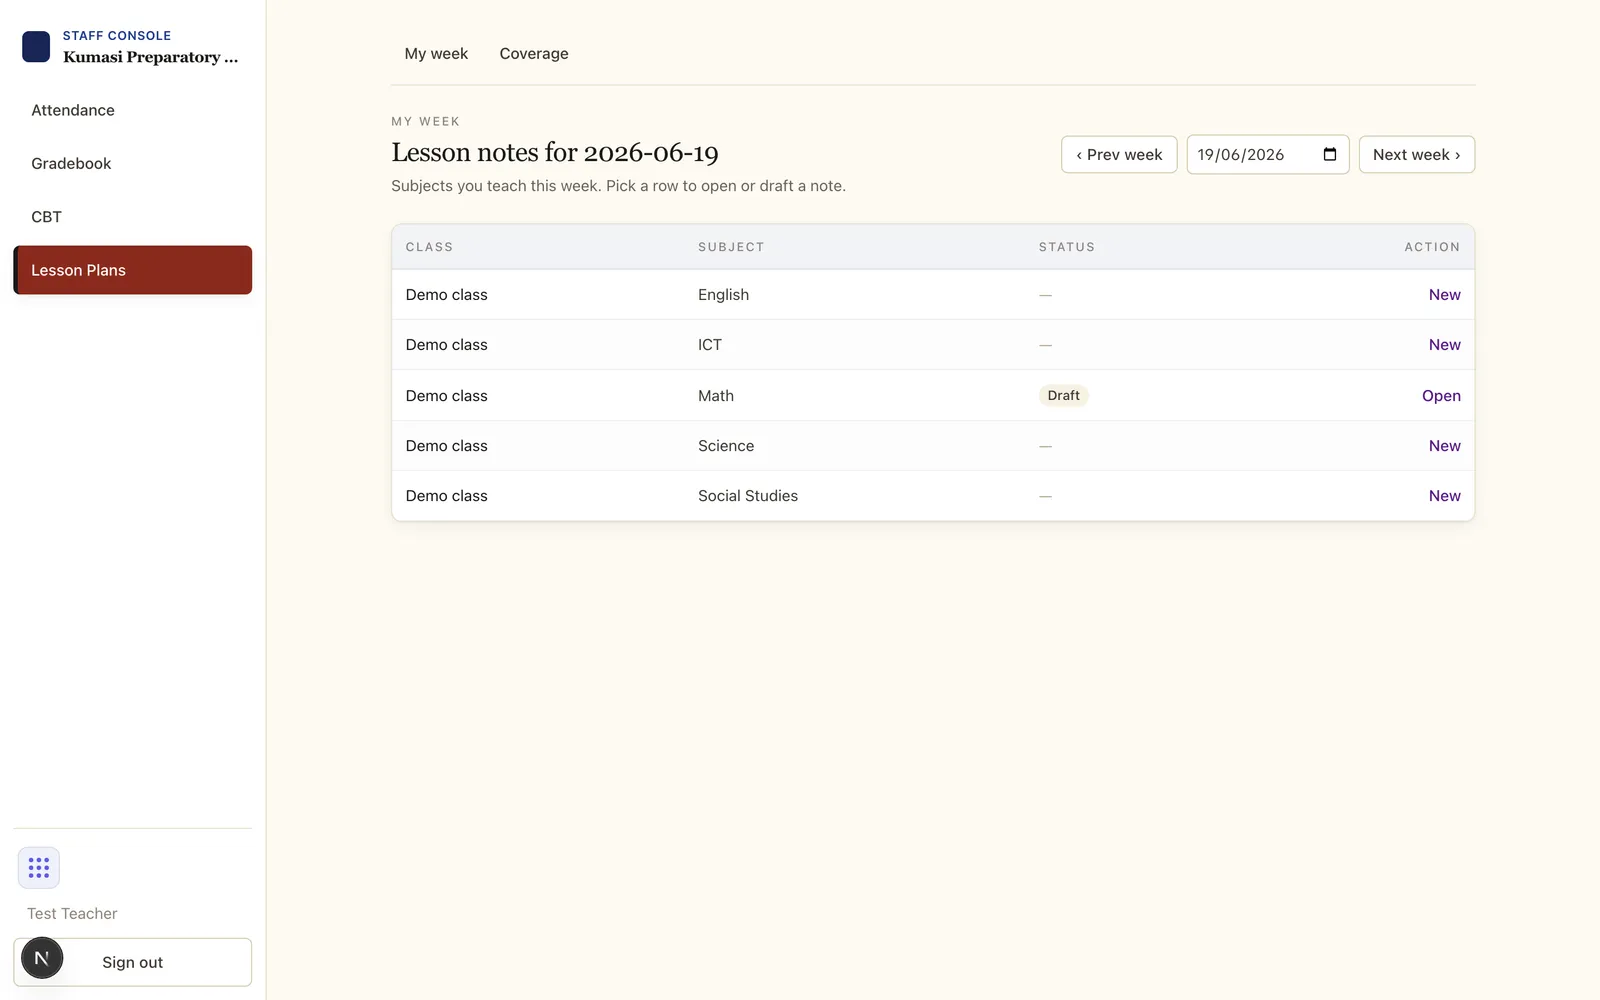
Open Lesson Plans. “My week” lists each class–subject you teach for the selected week (weeks end on Friday; use ‹ Prev week / Next week › to move).
Tap New on a row. Confirm the class, subject, and week ending; optionally tag the NaCCA indicators; then write your note.
Press Create draft. The note saves as a draft you can reopen and edit any time (Save draft); when it's ready, press Submit for review to send it to your school admin.
Watch the status pill: Draft → Submitted → Approved, or Needs revision with feedback. Notes needing revision reopen for editing — read the comment in the Comments thread, revise, and resubmit.